 |
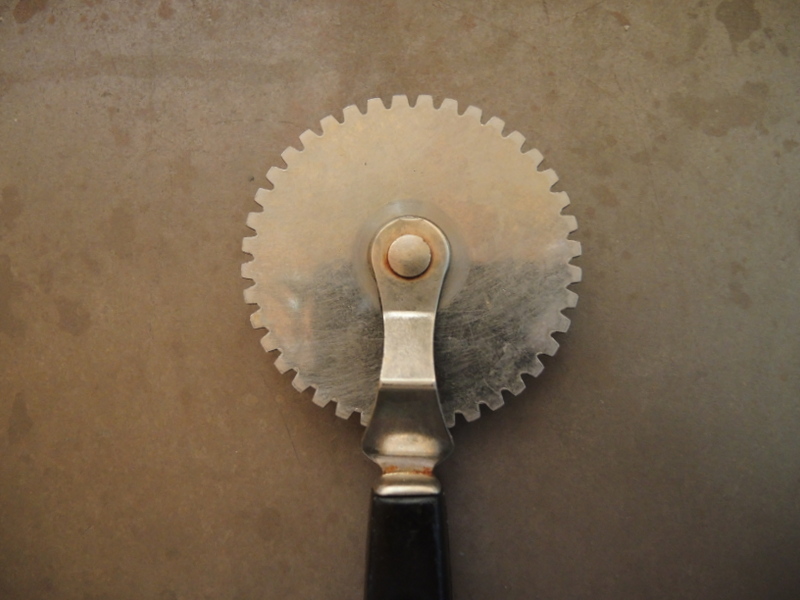
| Favorite Cracker Making Tool~~~do not know what it is called or where I got it... |
Here, where I live, in Maine I am "famous" for my homemade crackers. It has been suggested that I should blog the recipe/method for making these crackers. So here goes! About to become world famous!?! They are very wonderful and good!


So my basic recipe comes from my favorite cookbook Laurel's Kitchen (see Amazon link at the sidebar)
I have tweaked it a bit. I make 2 big batches and freeze them. They freeze wonderfully! We eat them straight from the freezer...they will not keep well otherwise. So for ONE big batch here is my recipe:
I start by sprinkling 1 tablespoon of yeast on to 2 cups of warm water and let that set while I mix the rest
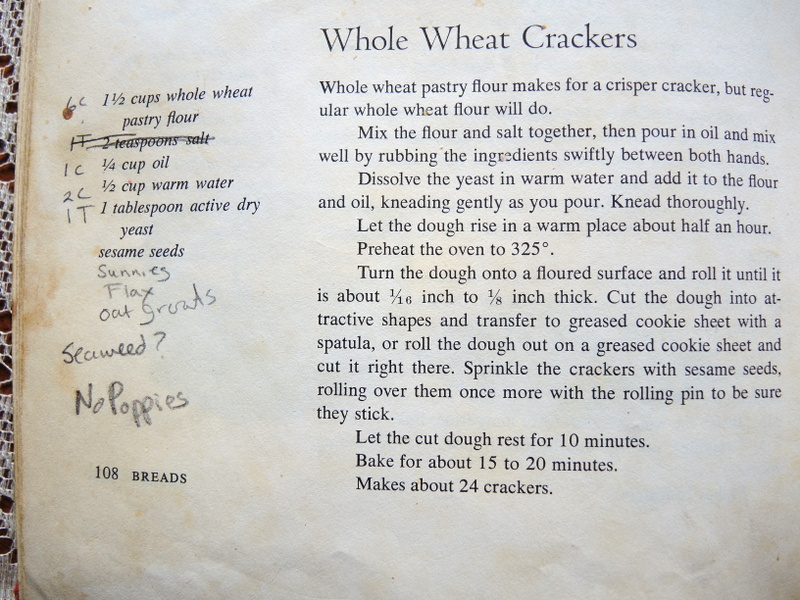
6 cups of Whole Wheat Graham or Pastry Flour...WW bread flour will be too gluteny. I find I do not get a nice crisp cracker with regular WW flour. I have used Bob's Red Mill WW Pastry Flour with great results (see Amazon sidebar link). Right now I am using a Graham Flour that I ordered from my "local" Health Food Store, Uncle Dean's.
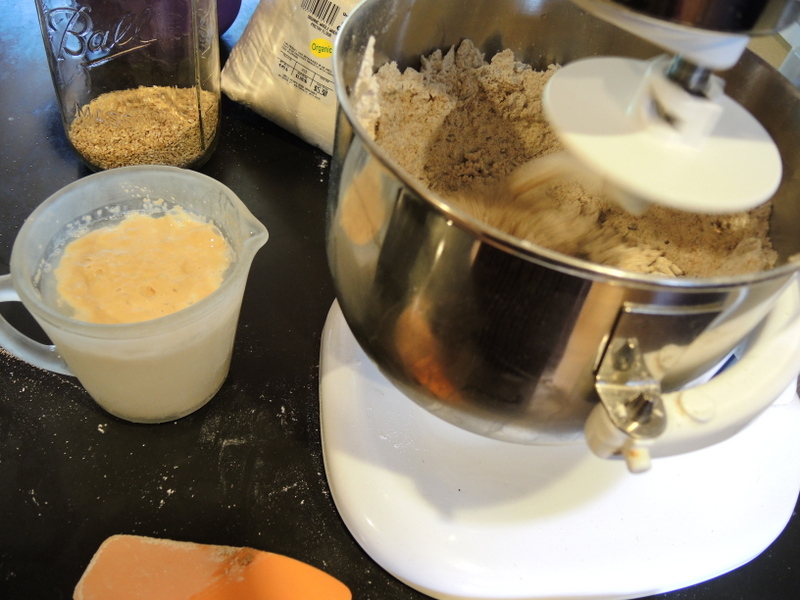
So put the 6 cups of flour in a mixing bowl ( have a mixer with a dough hook...Love it!)
I add to the flour:
1/2 cup raw Sunflower Seeds
1/3 cup raw Hulled Sesame Seeds
1/2 cup Flax Seeds
1/2 cup Oat Groats (Steel Cut Oats)
DO NOT ADD SALT TO DOUGH~~~It makes the cracker too salty ++if you want to make them salt free you can...I tried Poppy Seeds once...tasted weird to us...you my like it? sometimes I add seaweed when I am in a Mermaid Mood...

Mix that all Together

Then Add: 1 cup of oil...I use Extra Virgin Olive Oil...You could Use a Another Oil

Mix thoroughly so the flour is nicely coated with the Oil (see the yeast is bubbly)
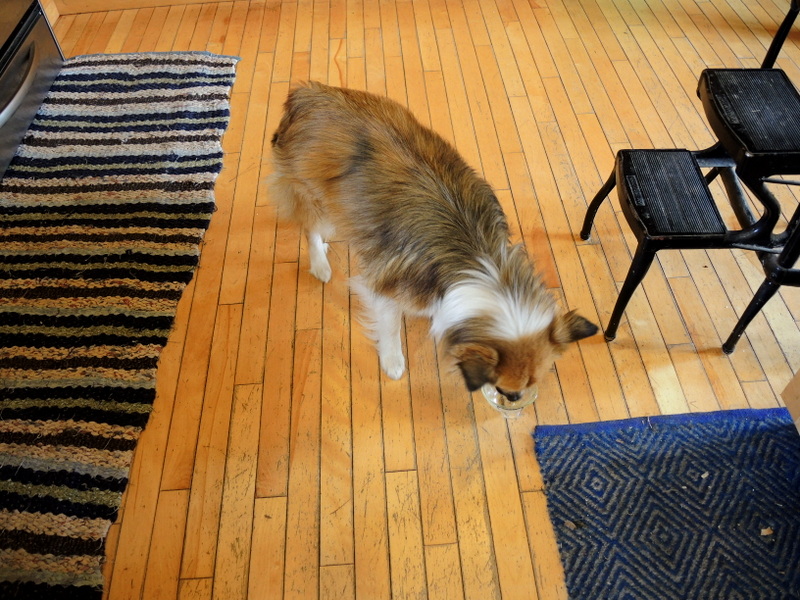
Let Runa lick the Olive Oil Cup (Yes~~those are handwoven rugs by me)

Add the 2 cups of yeasty warm water.
You may need to add more water or flour at this point.
You will want a very stiff dough. Temperature & Humidity do affect cracker making!
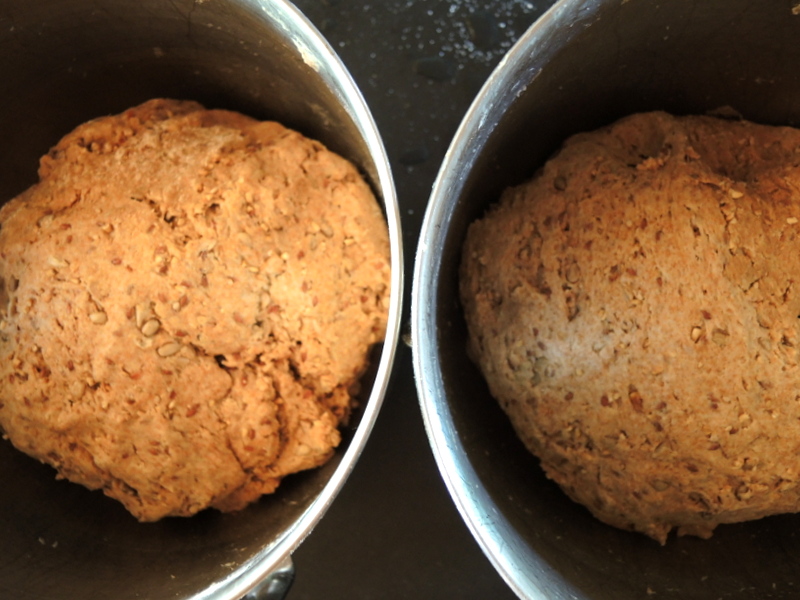
The dough will be very stiff with very little "spring". It should hold together and form a nice ball.
Cover with a damp towel and let it rest for a couple of hours or more. I find 4 hours to be best depending on the weather...less in the summer more in the winter.
I have mixed them up in the morning then baked them in the evening

ROLLING!
PRE-HEAT THE OVEN TO 350 F
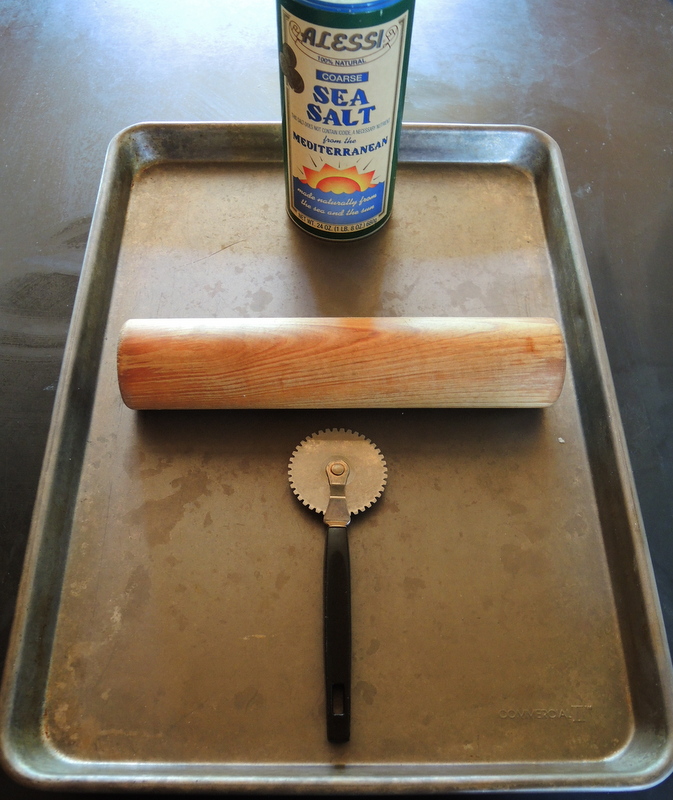
The Tools! This is my special Cracker Rolling Pin and Cracker Wheel Cutter.
The cutter I think I got it years ago in an auction $1 box lot. I have not found another and take very good care of it! The roller is a rolling pin I bought at a yardsale and removed the handles so I could roll crackers in the pan.

Lightly Oil the Pan ~ I usually get about 4 pans from each batch.

Rolling takes a bit of muscle! Roll the Dough out pretty Thin about 1/8 inch thin!


Now I cut with the wheel into the size crackers I want.
Sprinkle with Salt...I use different salts...this course Sea Salt is our favorite!

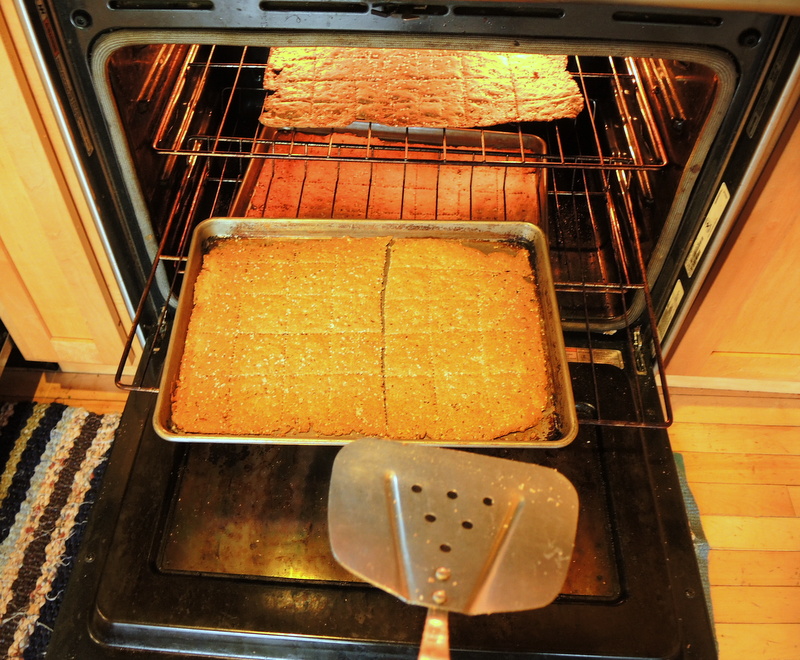
Now Baking takes some Practice.
Each oven is different. I recently got a convection oven and that does seem to reduce the cooking time. I can put in 3 pans at a time in my oven. What I do is bake at 350 for 15 minutes then rotate the pans (my old oven I baked at 375). Then I set the timer for 7 minutes. Now the "magic" wheel comes into play. I slide the whole sheet of crackers on to the oven rack and finish the baking keeping a close eye to avoid over browning...but my guys like the "burnt" ones so it is all good here! This creates a nice crispy cracker.
If you can't find the dot-to-dot wheel you could bake the crackers in a sheet and break them into rustic shape after baking. Or use a pizza wheel and leave them on the pan...they still will be good but not as crispy in my experience. I have used ceramic baking stones but the crackers do not come out well on them for me.

Let them cool! Eat & Freeze!
ENJOY!!!
If you have any questions leave a comment & I will answer!
No comments:
Post a Comment